


Time For A Website Update
Learn More
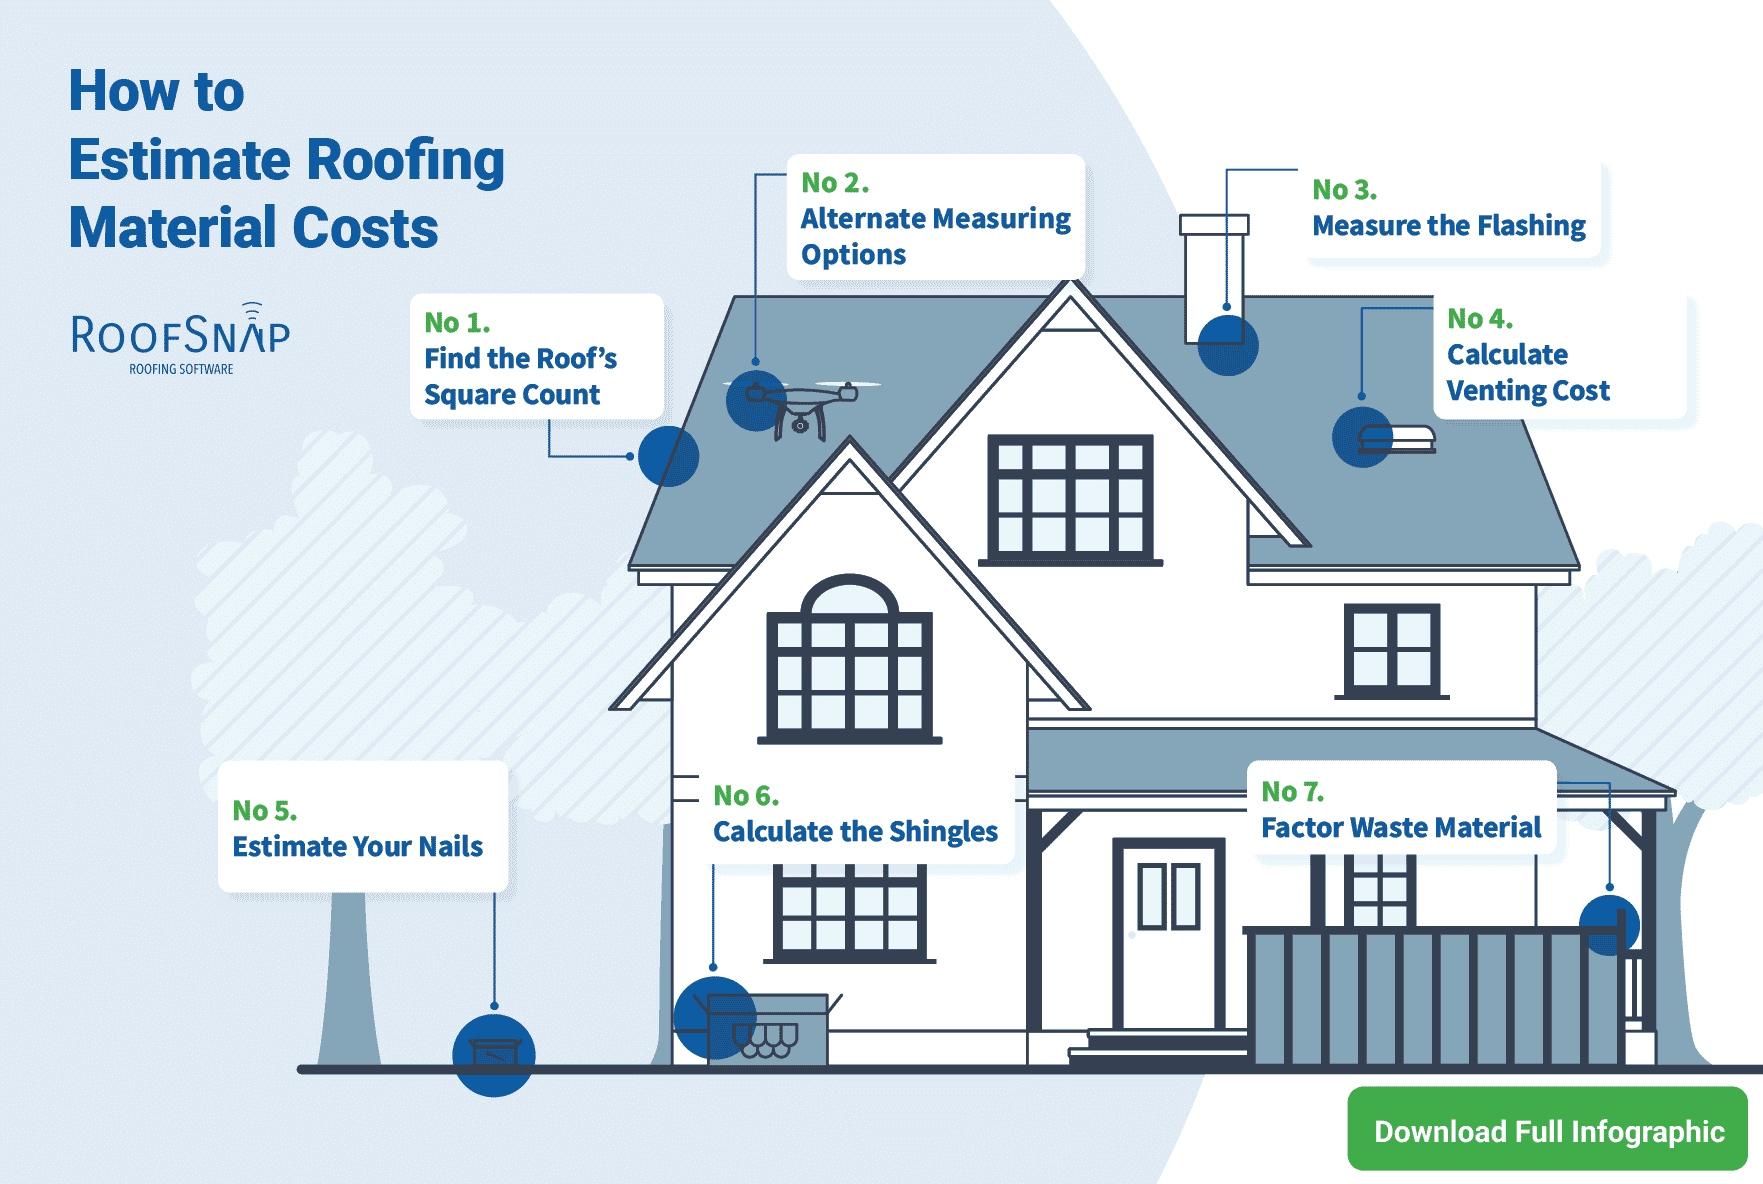
7 steps to accurately estimate a roofing project

By Katelyn Bilicich, RoofSnap.
Learn the essentials to make accurate roofing estimates and build a profitable roofing business.
Are you losing money with per-square bidding? Low bids lead to low profits, while high bids can result in lost opportunities. Learning how to make the most accurate bids for every roofing project is essential.
It’s important to ensure that every item that costs you is priced, but remember to account for all variables, including worker’s compensation overhead. Here at RoofSnap, we know that many roofers are seeking simplicity in estimating, which is completely understandable and achievable!
Here’s what you need to do to make a quality estimate/bid.
Step 1: Do your roofing pre-check
First things first: it’s time to break out the ladder and get on the roof. A thorough inspection of a roof is the best way to gather the necessary information for a roof estimating job.
Ask the right questions
1 - How long have you had this roof?
Start with the basics. Knowing at least an approximation of the roof’s age helps you diagnose the cause of damage. Is the wear of the roof due to age, or is it being prematurely damaged by other factors?
2 - Do you know how the damage occurred?
Understanding how a roof became damaged shapes your estimate by clueing you in to the materials or add-ons the new roof will need to avoid repeated damage.
3 - How long do you hope to have your new or repaired roof?
This question can help you distinguish between homeowners looking for a quick patch and those wanting to invest in the long-term sustainability of their roof.
4 - What type of roof are you interested in installing?
Many homeowners do little research before requesting an estimate. This question opens up the conversation, so you can explain their options and give them an estimate for the type of roof they really want.
Inspect the current roof
1 - What do the gutters look like?
Replacing a roof’s drip edge can become more complicated and expensive if the gutters are mounted through the drip edge. Is there a gutter guard over the top of the gutters? That’s more labor and time to remove the gutter guard to replace the drip edge.
2 - How many layers is the roof?
Examine the underlayment to determine how the roof was constructed and if the damage extends lower than the top shingle layer.
3 - What’s the condition of non-shingle elements on the roof?
Are you replacing just the shingles, or does the roof need updated vents and flashing? Does the roof have skylights? Most need to be replaced every 18 to 20 years.
4 - Is there excess debris to remove beyond the shingles?
Many homes now have obsolete satellite dishes or at least leftover brackets. That means extra labor to remove them as the new roof is installed.
5 - Are there obstacles that will extend labor hours?
Overgrown trees or patio covers can make replacing sections of shingles especially difficult and add man hours to the job.
Address building codes
Your estimate must take into account existing building codes for your area. You need to account for the added expense of using the right materials in the right amounts to keep your customers' roof within code.
Building codes often cover these common roofing elements:
- Shingle type
- Wind resistance requirements
- Restrictions on reusing flashing
- Underlayment
- Sheathing
- Ventilation requirements
Reach out to your local building authority to confirm codes and regulations.
Step 2: Measure the roof
Now it’s time to measure the roofing surface to understand the scope of the job.
The primary measurement until used in the roofing industry is a “square.” Like property is measured in acres, roofs are measured in squares.
1 square = 100 square feet of roofing surface.
So, if you measure a roof and it’s 1,800 square feet, then it’s an 18-square roof (1800 ÷ 100 = 18).
Now, you know you’ll need 18 squares worth of shingles to cover the entire roof (plus 10-to-15% extra to factor in wasted material).
Remember, physically measuring a roof is only one way to get the job done.
You can also use a roof measurement ordering service. Enter the target address, and you’ll have a professional roofing report in your email in just four hours.
Like to do things yourself? Remotely measure the roof DIY with software. Use HD aerial images of the roof and a state-of-the-art measuring tool from the comfort of your office chair.
Regardless of how you choose to measure, we always recommend taking your roof pitch measurements in person. (We also made a roof pitch calculator to speed things up)
Curious about RoofSnap’s Roof Measurement Orders
or our DIY Software?
Step 3: Estimate roofing material costs
You can’t provide an accurate roof estimate without understanding your material costs. If you run short on material halfway through a job, you face the difficult decision of asking the client to pay more or cutting your profit margin.
Here’s what to consider with estimating roofing materials.
Tips for estimating shingle cots
Roofing shingles are packaged in bundles. You calculate how many bundles you need based on the roof’s total number of squares.
In general, you want to order: 3 bundles per 1 roofing square.
While this is the general rule of thumb, some shingle types may require slightly more per square.
So, let’s say you’re estimating a 2,000-square-foot roof. How many bundles do you need to order?
Let’s do the math based on these factors:
- 1 square = 100 square feet.
- 3 bundles per 1 square.
For our 2,000 square foot roof, we calculate the bundles like this:
2000 ÷ 100 = 20 squares
20 squares × 3 = 60 bundles
Bingo: You need 60 bundles for this job.
Wait! What about factoring in wasted material?
A good rule of thumb is to add 10-to-15% extra material to factor in for waste—20% for highly complicated roofs.
10% of 60 bundles = 6.
Now you know to factor in 66 bundles for your estimate.
Tips for estimating nail costs
Estimating nail cost starts with knowing how many nails per shingle you need. Numbers can vary between brands, but for most standard three-tab shingles, you need:
- 5 nails per starter shingle
- 4 nails for field shingles
To calculate, verify how many shingles come per bundle. Most bundles come with between 15-29 shingles. Next, determine how many starter shingles you’ll need and multiply it by 5 nails.

Finally, multiply the total number of non-starter field shingles by 4. Add these two amounts together for the total number of nails.
For example:
X bundles × Y shingles per bundle = Z total shingles.
X starter shingles × 5 nails = Z total starter nails.
X field shingles × 4 nails = Z total field nails.
X starter nails + Y field nails = Z total nails.
Keep in mind, in a high-wind area — like cities in hurricane or tornado zones — it’s recommended that each shingle has 6 nails. Make sure to check your shingle manufacturer’s specifications as well as city ordinances to confirm nail requirements.
Tips for estimating flashing costs
Estimating flashing costs highly depends on the specific style and brand you will be installing. Apron flashing might come in a 10ft stick piece, while trim coil flashing might come in a 50ft roll.
It’s essential to get on the roof to assess what flashing has been used and how much needs to be replaced.
Tips for estimating vent costs
Like with flashing, estimating vent costs depends on the type of venting that needs to be replaced. Verify what venting is on the roof, confirm the extent of its demand, and determine what needs to be replaced.
Want to simplify estimate building? RoofSnap’s Estimate Builder let's you quickly swap out shingle color, add/remove line items, calculate material costs and generate professional estimates in seconds.
Often “underestimated” materials
Here are a few items we commonly see underestimated on roof estimates.
Hip and ridge cap
For steep-slope residential roofs, the hip/ridge cap is the most significant and costliest variable that is often overlooked.
Remember how we mentioned per square bidding was a bad idea? Here is an example of how one item per square can affect your bottom line on different roofs:
Roof #1:
25 squares of shingles @ $175/sq cost = $4,375
50ft of standard hip/ridge @ $2.50/ft cost = $125
Total Cost: $4,500
Bid at $350/sq = $8,750
Gross Profit Margin: 48.5%
Roof #2:
25 squares of shingles @ $175/sq cost = $4,375
300ft of standard hip/ridge @ $2.5/ft cost = $750
Total Cost: $5,125
Bid at $350/sq = $8,750
Gross Profit Margin: 41.4%
That’s a huge difference in potential profit and could mean the difference between making or not making ends meet. Keep in mind that this profit margin percentage is overinflated. It doesn’t factor in additional material, labor and overhead costs.
Starter
We admit that this item can sometimes be skipped on some asphalt roofs since it’s such a low cost. But it can still nudge your bottom line in the wrong direction. So, why not account for it?
The starter can make a huge difference on other types of roofs, though. For instance, a bundle of cedar shake starter is very expensive and only covers about 17 linear ft! The same is true for some specialty asphalt shingles that require a special starter.
On a side note, it’s always best to use a purpose-built starter instead of 3-tab field shingles. They cover more per bundle & usually end up being cheaper in the long run.
Underlayment
30# felt costs twice as much as 15# felt. Yes, it’s often the same price per roll but covers 1/2 as much. We won’t even get into the countless synthetic underlayment options on the market.
The point is you should know your cost on every item for every job. If a project requires a more expensive item, that expense should be accounted for.
Ice and Water Shield
This one often sneaks up on estimators. If Ice and Water Shield is coded on the eaves, a hip roof will need a lot more than a gable roof. There’s no way to accurately include this in a per square price.
Step 4: Estimate labor and rental costs
Estimating labor costs
To determine your labor costs, follow these steps:
1 - Calculate Necessary Labor Hours For The Job
How many hours of labor will it take for your team to complete the project? Let’s say you estimate your three-person crew can complete the roof in 30 hours.
30 hours × 3 crew members = 60 labor hours.
2 - Find the hourly labor wage
Hourly labor wage is both your crew’s hourly pay plus taxes and worker’s compensation. So, if your hourly rate is $19 an hour, you should add 20% to cover tax and insurance.
20% × $19 = $3.80
Now add that to your base hourly rate:
$19 + $3.80 = $22.80
So, your hourly labor wage is $22.80.
3 - Find your total labor cost
Multiply your labor hours by your hourly labor wage. In this example, that would be:
60 labor hours × $22.8 labor wage = $1,368 total labor cost.
Estimating rental costs
Don’t forget to factor in any equipment rental costs you may need to complete the job. Commonly rented roofing equipment includes the following:
- Air Compressors
- Dumpsters
- Pressure Washers
- Light Towers (more common for commercial jobs that require after-hours work)
- Utility Trailers
- Generators
Step 5: Account for overhead and profit margin
Don’t forget, it’s not just the materials and time that cost you on a roofing job. Make sure you factor in your business’s overhead costs and calculate this project’s profit margin.
Determining overhead
Overhead cost refers to the ongoing business expenses not directly tied to delivering a product or service. Factoring in overhead costs is critical to keeping your business profitable.
Here are some common overhead expenses to include in your calculations:
- Rent
- Utilities
- Insurance
- Gas
- Office supplies
- Advertising expenses
- Software tools like RoofSnap
- Accounting and legal expenses
- Salaries and wages (including salary for the owner)
We recommend compiling your overhead costs and calculating your weekly overhead expenses. Let’s say in a week you have an even $1,000 in overhead cost.
You can then divide your weekly overhead cost by working labor hours per week. For this example, we’ll say your three-person crew works 120 labor hours a week.
$1,000 weekly overhead cost ÷ 120 weekly labor hours = $8.3.
This means you should charge an additional $8.30 per labor hour to cover overhead expenses.
Another method is to use historical data to determine last year’s total overhead cost. Then, you increase it by a small percentage to account for inflation. Finally, you divide that cost proportionally over each job.
Finally, some businesses simply add a standard 10% overhead charge to every job to ensure they cover costs and stay profitable.
Calculating roofing profit margin
Your profit margin is how much net profit you’re left with when all other costs for the job have been paid. This includes the cost of rendering the service (material, labor, etc.) plus your overhead costs.
We’ll call this total cost your break-even cost — the amount you would need to charge to make $0 on the project.
To ensure you make a sustainable profit, it’s best to determine a standard percentage of profit you want to make and apply that to your break-even cost.
A 6% profit margin was the average for roofers in recent years. However, roofing is an industry notorious for low profits. Historically, 90% of roofing contractors underbid their jobs.
A good rule of thumb is to aim for a 15-20% profit margin.
Once you determine your profit margin percentage, the rest is easy.
Take your break-even cost (cost to render service + overhead cost) and multiply by your profit margin. Let’s say your break-even cost on the job is $7,000, and you want a 15% profit margin.
$7,000 break-even cost × 15% profit margin = $1,050 profit.
So, your final estimate for the roof would be $8,050 (break-even cost + profit margin).
Register for estimating webinar
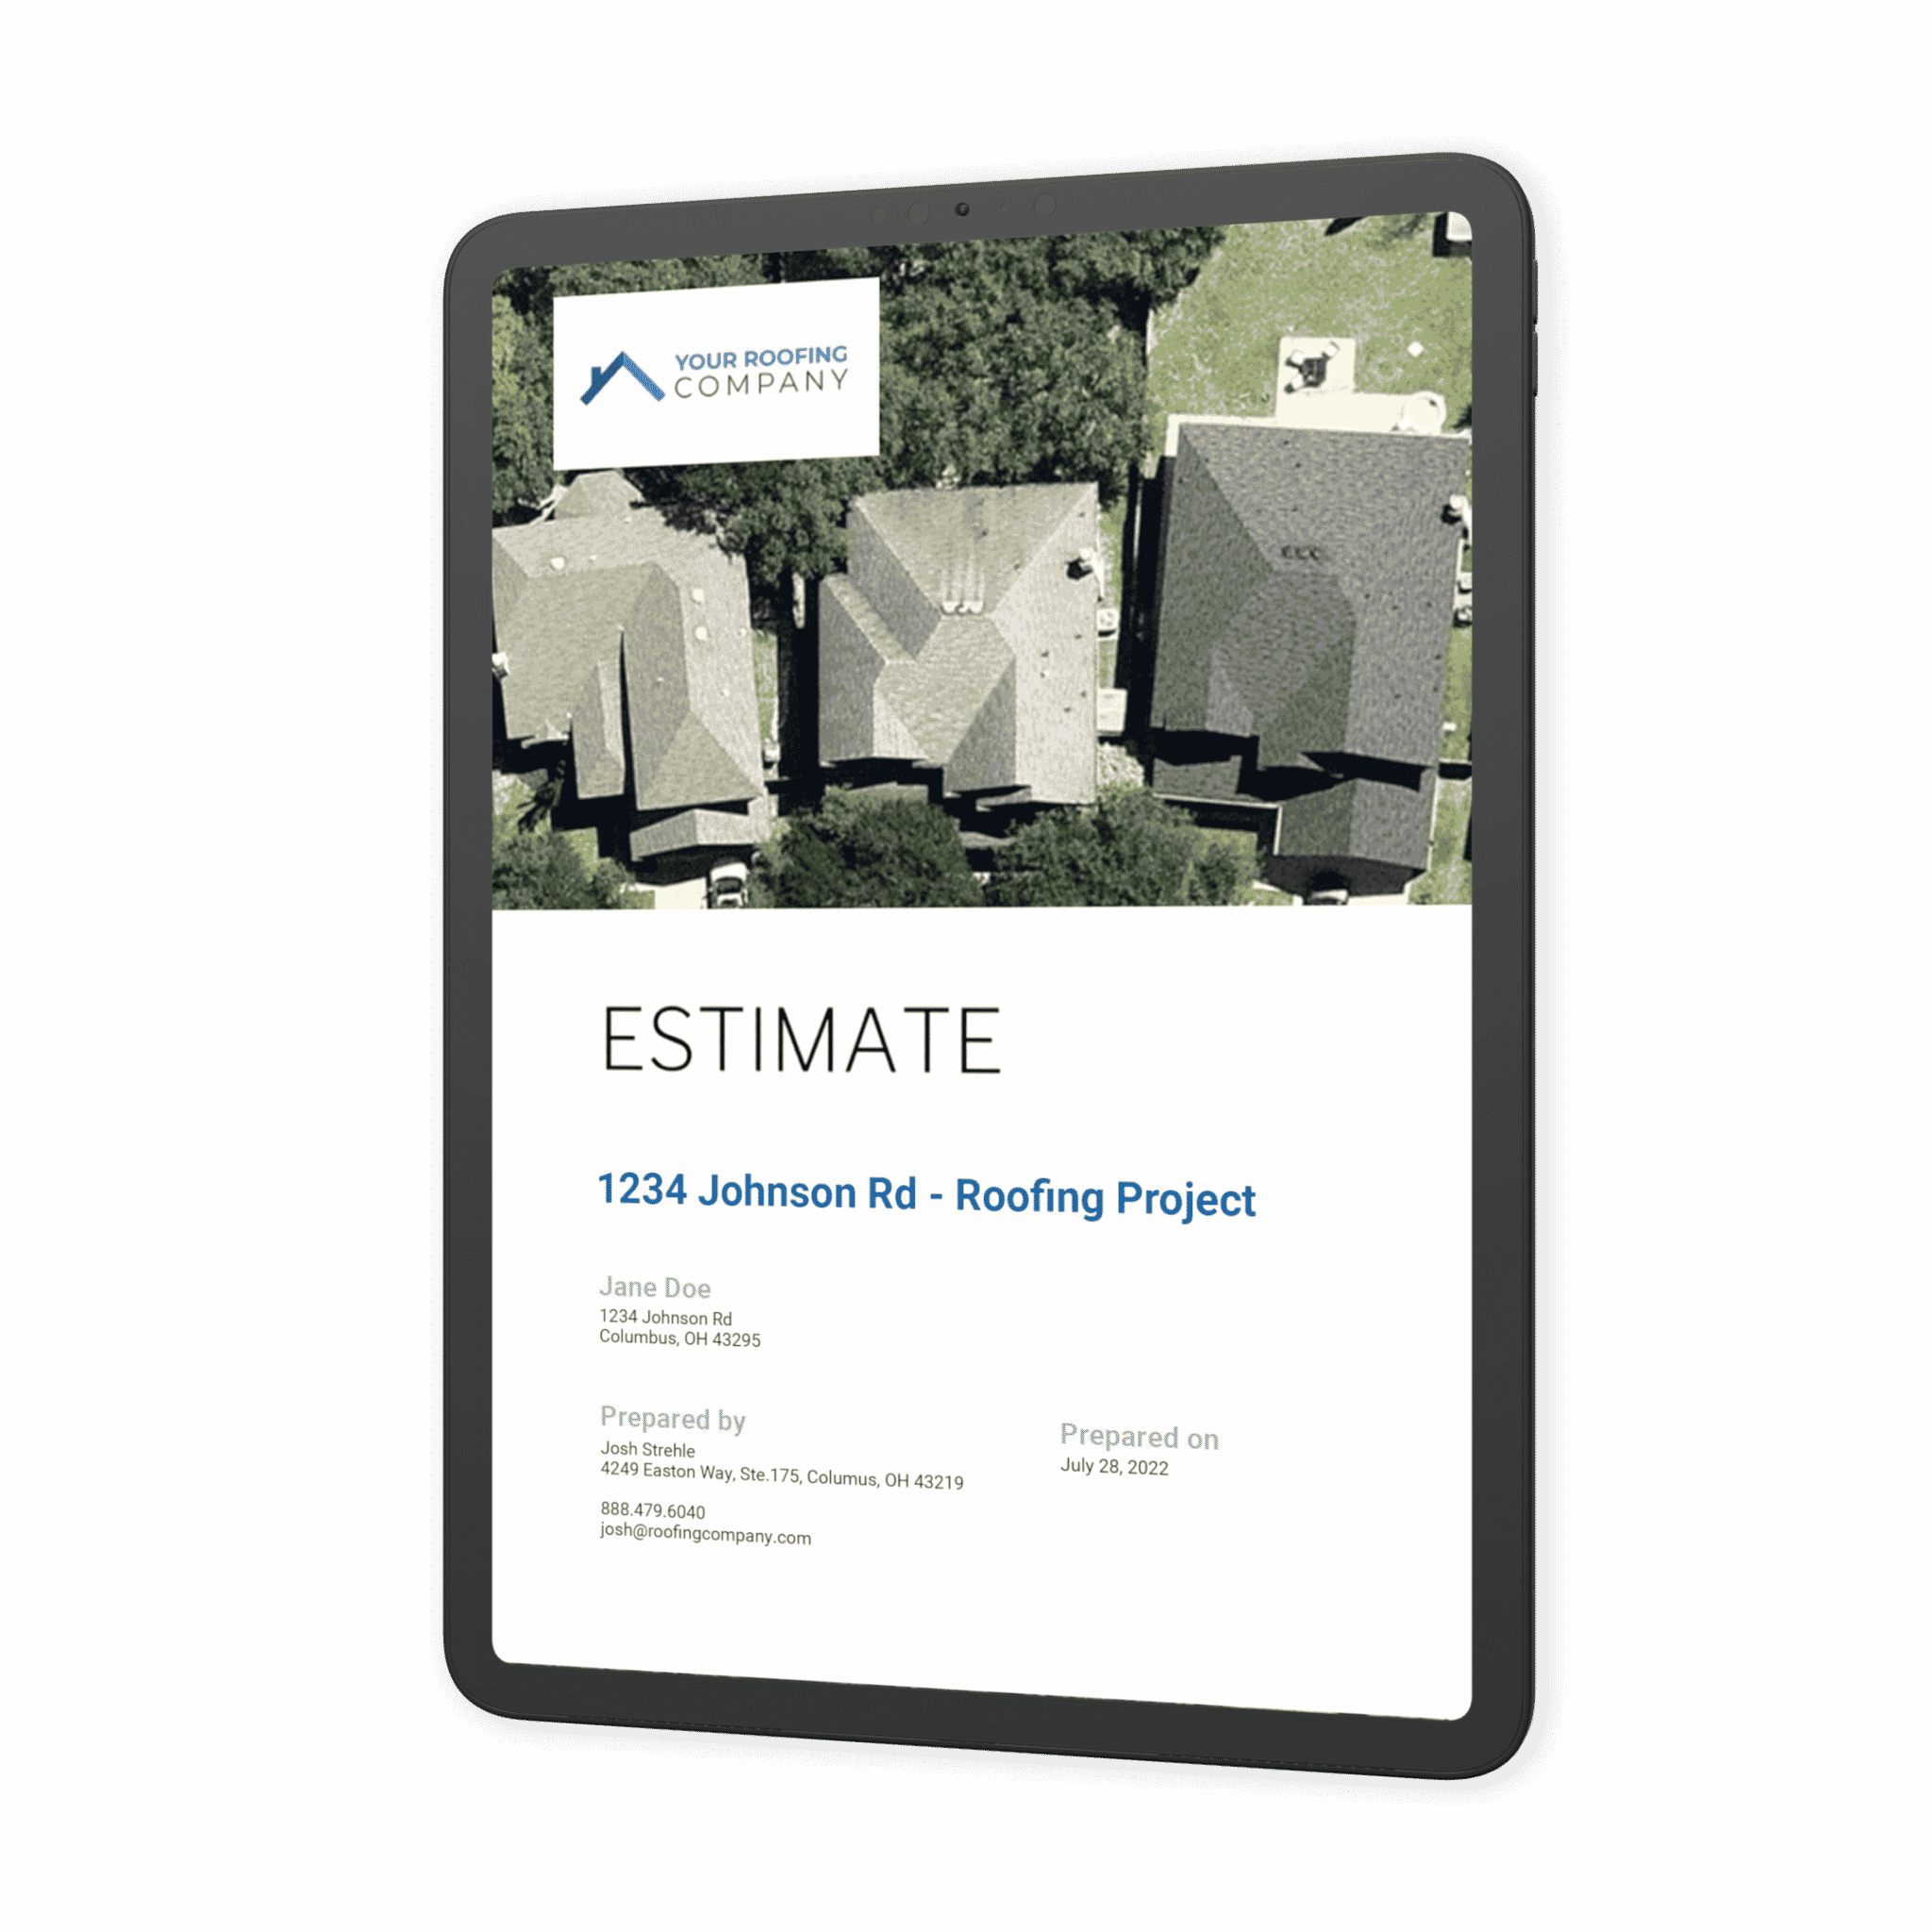
Step 6: Create the formal roofing estimate
After you complete the individual estimates for each part of the job, compile them into a formal roofing estimate.
What should ACTUALLY be included in your roofing estimate?
-
Detailed description - Include a concise but full description of the work you will complete for the project.
-
Project timeline - Give the homeowner a projected timeline for the job.
-
Transparency in pricing - In addition to the total price, you should list line items for each part of the job. This includes labor, installation, demo and haul-away costs.
-
Material costs - List the cost of all materials that will be required to complete the work.
-
Payment details - Outline payment terms, due dates and late fees, if applicable.
-
Disclaimer - Add a disclaimer if your legal team has created one for you.
Roofing estimate templates
Don’t start from scratch every time you create a new estimate. Instead, use a professional roofing template that you can plug details into for each client.
Make sure your roofing estimate template includes the essentials:
-
Your company’s logo
Contact information
Proof of professional licensing
Legal disclaimer
(Looking for a way to simplify roofing estimates? RoofSnap has an estimate builder. Just plug in the details, and RoofSnap generates a professional estimate ready to deliver to your client.)
Step 7: Deliver the estimate
And just like that, you’ve got an accurate, professional estimate ready to deliver to your potential customer. The hard part is done, right? Yes, but you still need to stick the landing.
Make sure you write an effective email to deliver your estimate. Here are a few things to include:
1 - A clear subject line
Now isn’t the time for a cleverly subject line. At a glance, your prospect should understand why you’re emailing. Stick to a simple subject line that can’t be misunderstood.
“Your Roofing Estimate Is Ready”
“Johnson Family Roof Estimate – City Roofing Inc.”
2 - A friendly intro
In your introduction, include the homeowner’s name and re-establish the context for the estimate. Plus, it never hurts to thank them in the process.
“Hi Jane, Thank you again for letting me come out and inspect your roof. Your estimate is ready for review.”
3 - Instructions on how to view the estimate.
The simplest strategy is to include the estimate in the body of the email. However, if you attach it to the email, make sure to call it out, so the prospect doesn’t miss it. You can also include a summary of what is in the estimate.
“I attached the estimate as a PDF to this email. In it, you’ll find a line-item breakdown of the work and materials required, a project timeline, and the total cost.”
4 - Next steps for moving forward with the project
Finally, make sure your potential customer knows exactly what to do when they’re ready to hire you for the project. Then close out the email with a thank you and your relevant contact info.
“If you would like to move forward with this project, please email or call me at 555-1010. I’m happy to answer any questions you might have. We hope to be working with you.
Thank you,
John
City Roofing Inc.”
555-1010
John@cityroofinginc.com
Roofing estimate checklist
We know there was a lot of information to digest in this article.
Need a quick guide to help you create your next estimate?
Download our “7 Steps to Estimating a Roofing Job” checklist.
Building a profitable roofing business
The most important number in your business is your profit margin. This should be the number you use to track the performance of your sales reps & company as a whole, not a per square price.
You should even consider removing per square pricing from your company culture altogether. Encourage your sales team to focus on profit margins instead of discussing what per square price they got on a project. We hope that some of these roof estimating tips will help your company maximize profits & increase sales.
Original article source: RoofSnap
Learn more about RoofSnap in their Coffee Shop Directory or visit www.roofsnap.com.
Recommended For You

Ways to Broaden Your Resources and Tools
Read More ...
Hit the beach and the trade show booths at the 2025 SprayFoam Convention and Expo!
Read More ...
Cotney Attorneys & Consultants Announces Roofingmapping.com as Affinity Partner
Read More ...


Comments
Leave a Reply
Have an account? Login to leave a comment!
Sign In