Self-Adhered Roofing Products: 5 Tips for Success

By SOPREMA.
Following installation guidelines important for successful installation, and time and labor savings.
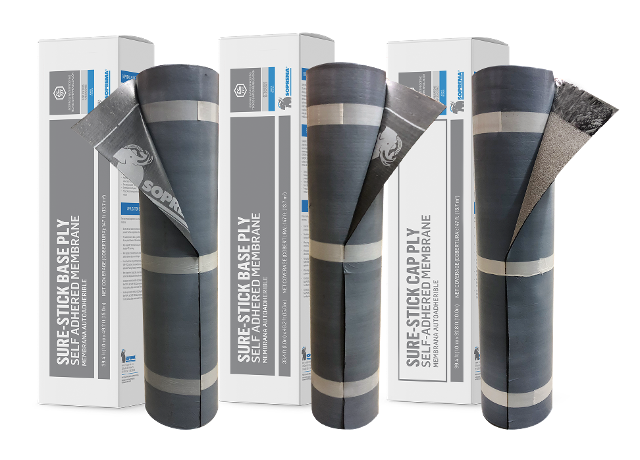
Self-adhered roofing products are on the rise in the industry, and for good reasons. One of which is that they offer substantial time and labor savings due to their simple application methods. Although application of these products is simple, ignoring installation guidelines can result in the application not going as planned. To help avoid these situations, we have compiled a list of tips for success when installing a self-adhered roofing system. From storage and handling to monitoring weather conditions leading up to installation, following these steps will help in preventing a jobsite mishap.
1. Proper storage and handling
Proper storage can make or break your project when using self-adhered membranes. When storing product, it is important to protect the material from extreme heat and cold, UV, moisture, and dust and debris. Membranes should be stored inside at 70°F, in the original box and free of any moisture or water. If left in cold or hot temperatures, rolls may stick together or lose tack overtime. If the pallet packaging is removed, maintain self-adhered products in the boxes and in an upright position on a pallet or elevated surface. Rolls should not be laid down on their side as this will cause the roll to deform.
2. Proper Substrate Preparation
Understanding the substrate to which you are adhering and if it requires a primer or not is key to a successful application. Some membranes do not require a primer under normal circumstances, though special consideration may need to be taken. Primers are designed to aid in bonding the membrane to the substrate and increase initial tack and long term bond. The substrate must be completely free of dirt and dust prior to membrane application. A dirty or dusty substrate means the tacky underside of the membrane will stick to the dirt and dust, not the intended substrate.
3. Monitoring Weather Prior to Application
Weather conditions should be monitored prior to application. For the best results, application should be done on a sunny day with temperatures at least 50°F and rising. A nice sunny, warm day will ensure the self-adhered membranes will fully adhere and securely bond to the substrate. If application must happen in colder temperatures, heat can be applied to the membrane in order to increase the interply bond strength and seal side and end laps. Refer to the manufacturer’s specific temperature restrictions before application.
4. Following Proper Procedures at T-joints
In roofing, t-joints are not something that you want to see. A t-joint occurs when the membranes lap over each other on the base ply (side lap), and then the next sheet is applied on top of that intersection. These are common areas where leaks form due to the straight path of water through the joint and the capillary action of the small opening. It is important to cut a 45° angle in the overlapping sheet and use a bead of cement to prevent water from working its way through the sheet.
5. Proper Planning
Once a release film is removed and the membrane is down, it is very hard to get back up without damaging the sheet or the substrate. These membranes are designed to stick! Ensure end and side laps are spaced correctly, rolls are inline prior to removing the release film and primer is on site if needed. Care should be taken to make sure the membranes are unrolled prior to application and allowed to relax, as this will aid in application. Self-adhered application can be very fast and easy as long as everything is done correctly and planned for beforehand.
Although every project and application is different, these tips for success can be used to help ensure a smooth installation. Always remember to properly prepare and monitor project conditions throughout the application process and keep an eye out for t-joints. If you are ever unsure of specific details for your project or have product questions, always contact the product manufacturer for guidance. So, keep these steps in mind and start seeing the time and labor savings difference with self-adhered products!
Learn more about our new SURE-STICK™ self-adhered roofing membranes!
For more information about SOPREMA visit here.
Editor’s note: This article was first published on SOPREMA's blog and can be viewed here.
Recommended For You

Reviews are in for Stormseal
Read More ...
Franklin International’s 2024 milestones!
Read More ...Which Type of Coating Better Withstands Ponding Water
Read More ...


Comments
Leave a Reply
Have an account? Login to leave a comment!
Sign In