
.jpg")


Safe and secure attics in three easy steps!

By Emma Peterson.
The StormStop™ ridge vent is easy to install, easy on the eyes and easily the best option for balancing ventilation with protection.
Ventilating an attic is necessary for the safety and security of a home, but from snowstorms to heat waves it can be difficult to balance letting the right airflow in and keeping the other elements out. Traditional ventilation systems are bulky and time-consuming for installation, but Quarrix’s StormStop™ ridge vent stands out among the crowd.
StormStop Ridge Vent’s weather blocker membrane is a spun bound material designed to be 71% open and 29% closed. This advanced technology allows it to repel elements such as snow, rain, sand and bugs while still allowing air and moisture to leave the attic. Designed without an external baffle, keeping StormStop clog-free from pine straws and leaves. Even with all those features, it maintains a sleek and attractive appearance with a low profile along the ridge of the roof. The cherry on top is the smooth and efficient installation process of this gun-nailable vent.
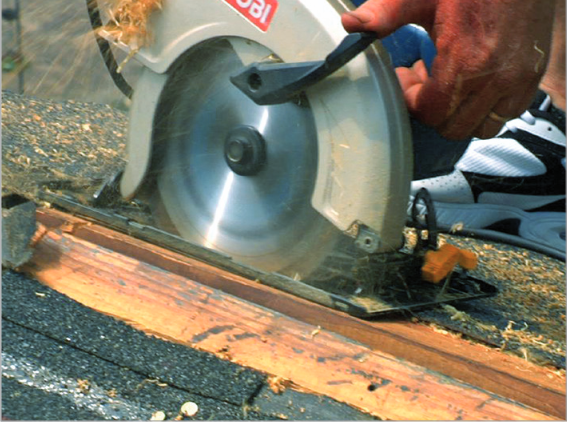 1 - Ridge slot preparation
The first installation step is cutting a slot on the roof. This can occur both before or after shingle installation. Precision is key in this step as the StormStop ridge vents have precise measurements and you need at least 6” left uncut on the end of each ridge. Once the slot is cut, including the trimming of overlapping shingles along the ridge, it’s time to move onto step two out of three!
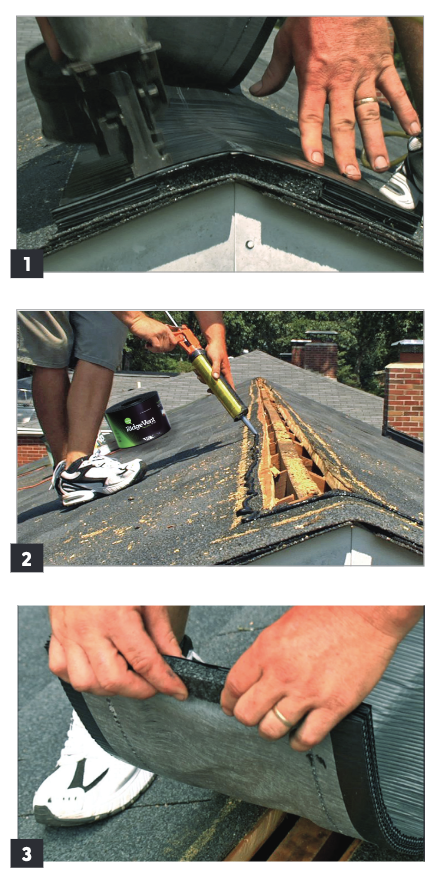
2 - End cap installation
The second step is to separate the foam end cap found in the vent by taking advantage of the pre-cut section. From there, you need to add the foam end cap to both ends of each section. Do this by using a construction adhesive or sealant caulk, such as butyl sealant conforming to ASTM C1085, latex sealant conforming to ASTM C834, silicone sealant complying with ASTM C920 or asphalt roofing cement complying with ASTM D4586, to ensure a weather-tight seal.
3 - Vent placement
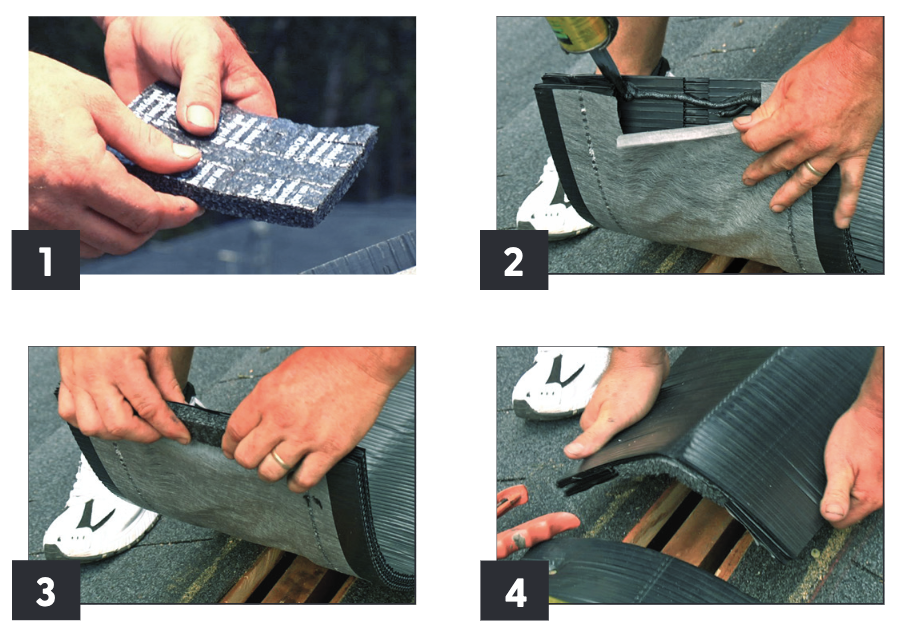 In the third and final step of installation, it is time to place your prepared StormStop ridge vent on the roof. This process should be smooth and efficient with the prep work done in steps one and two. Simply place the vent over the slot and utilize Quarrix Ridge Vent’s One-Pass™ Installation system, which allows the simultaneous installation of cap shingles and the ridge vent. Double check that your nails penetrate the wooden roof deck by at least three quarters of an inch for the StormStop to be secure.
Learn more about Quarrix in their Coffee Shop Directory or visit www.quarrix.com.
Recommended For You

Westlake Royal Roofing Solutions Introduces New Unified Steel™ Cool Roof Rated Colors
Read More ...
New Products Now Available from Duro-Last
Read More ...
Raising the roof for a cause
Read More ...


Comments
Leave a Reply
Have an account? Login to leave a comment!
Sign In